![]()
Recently visited
Featured Projects
Web Applications
Links
Other Projects
- Chainsaw Bike
- STM32F429 LCD Example
- My PHP Content Managing System
- PHP image handler
- Flyback-transformer driver
- Atari Punk Console
- Teensy - ESP8266 - Interface
- Charging station
- 4-bit Adder
Meta
Get the STM32F429 Discovery board running on Mac OSX
May 2016Quite a while ago I bought myself a stm32f4 discovery board, with the intention of putting my hands on 32-bit microcontroller programming. The chip on the board, the stm32f429, is a Cortex-M4 powerhouse with 2 Megabytes of flash and 256 kilobytes of RAM, as well as many peripherals and built-in dedicated logic to compute CRC checksums, interface LCD-TFT displays and much more. It is a great board to get started.
 Like all images on this page, click to see in full size.
At the time I had built myself a programming environment by piecing together free software and command line tools, following this recipe. It was enough to blink an LED on the board, but as soon as I wanted to play around with the code examples given by ST, I hit a brick wall. Upon compiling, I would only encounter a few errors. But each error fixed would uncover 10 more compile errors. The problem wasn’t the code itself, but the programming IDE I was using. I just couldn’t get those tasty ST code examples to compile. So I put the board aside and focused on other projects.
Doing it right
About a year later, earlier this month, I dug out my discovery board again. Knowing my previous IDE would fail me, I looked around for alternatives.
After a bit of searching I found a page on ST’s site that lists many software IDEs that support their chips. I wrote down all the free ones that seemed promising:
- Atollic Truestudio - So far only for Windows, site says “Linux and Mac OS X support is scheduled for later this year”
- CooCox CoIDE - Windows only
- OpenSTM32 System Workbench - Windows, Linux and Max OSX
Having a Macbook running OSX El Capitan (10.11), I really only had one option – the OpenSTM32 System workbench. It is based on free software, such as the Eclipse programming environment. To install the package, you simply download an installer and run it.
At first it gave me an error saying my Java RE (Runtime Environment) was out of date, even though the System Preferences showed me a version higher than the one required. I solved the issue by installing the newest Java SE Development Kit, which is different from the standard Java installation.
From there the installation worked like a breeze and without complications. What I cherish most about the System Workbench is the extensive wiki on the homepage that really helps you out. Everything you need to get started, is in there.
Your first code project
For your first code project to flash onto the STM32F4, I recommend the “hello world” of electronics – to blink an LED. For this, you must first download the STM32CubeF4 Software Package. It is a collection of software examples for the STM32F4 line of microcontrollers.
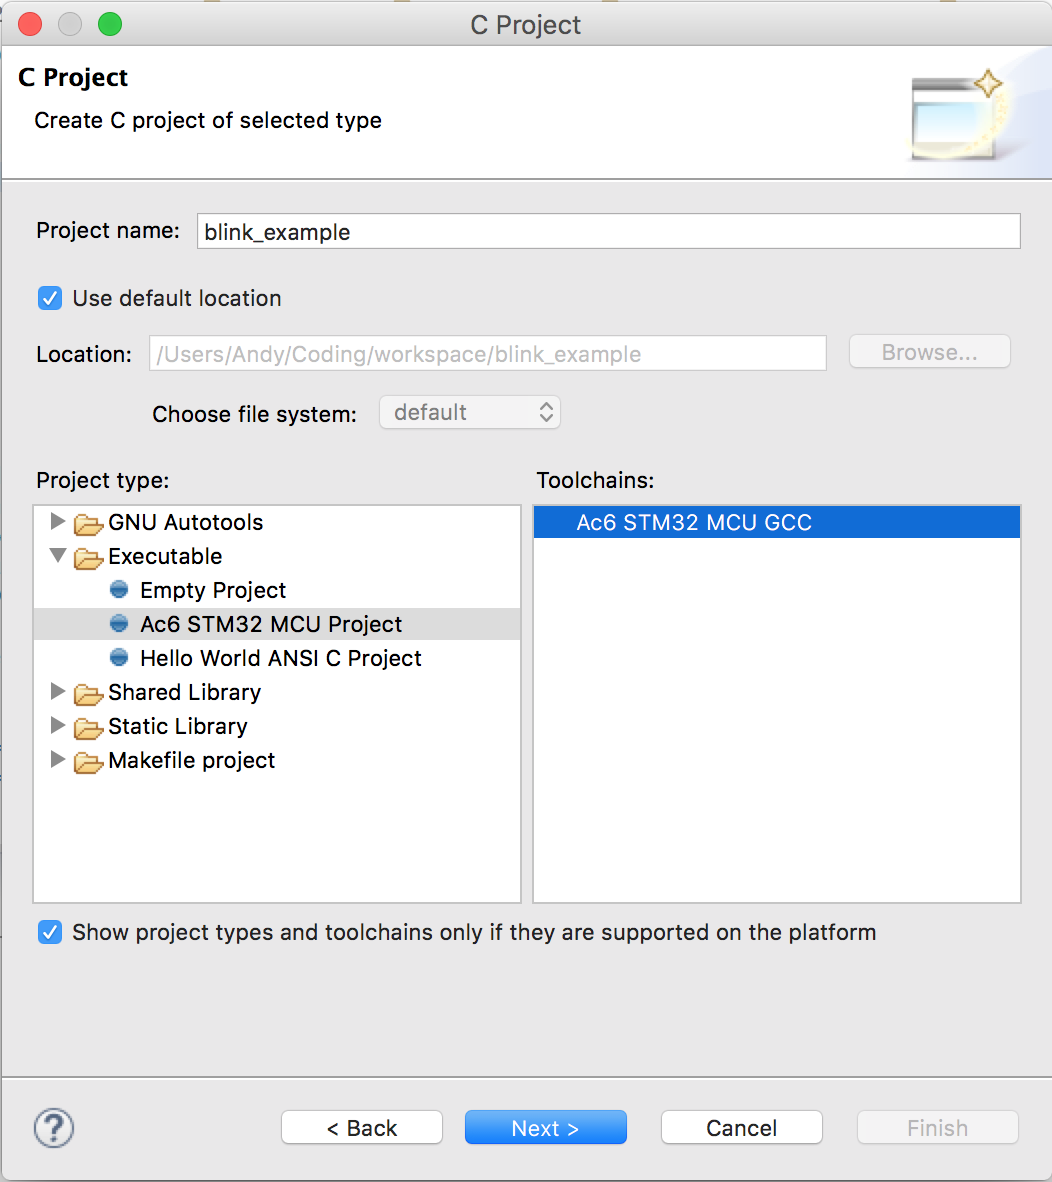
While that’s downloading, we will create a new C-Project in Eclipse called “blink_example”. To do that, click on “File -> New -> C Project”. Select “Ac6 STM32 MCU Project” under “Executable”.
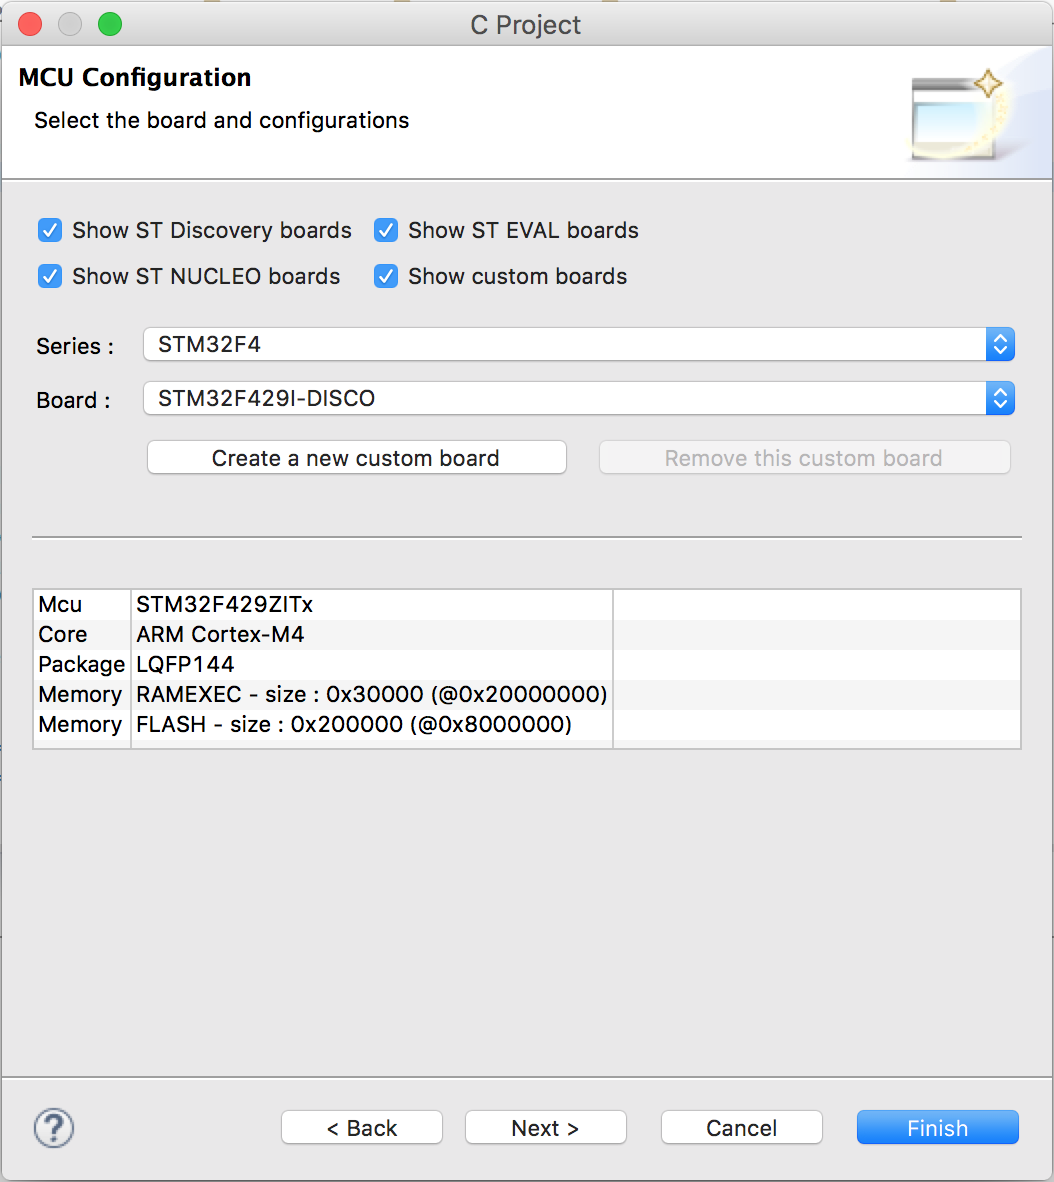
Click “Next” until you are prompted to select a board. You will find two STM32F429I discovery boards. The “DISC1” is the newer version that uses “ST-Link/V2-1”. “DISC0” uses “ST-Link/V2”. The name of your board should be printed on the board itself. My board is of the DISC0 kind.
Hit “Next” and check the box “Hardware Abstraction Layer”. If you don’t have it installed yet, it will prompt you to install it. Do that.
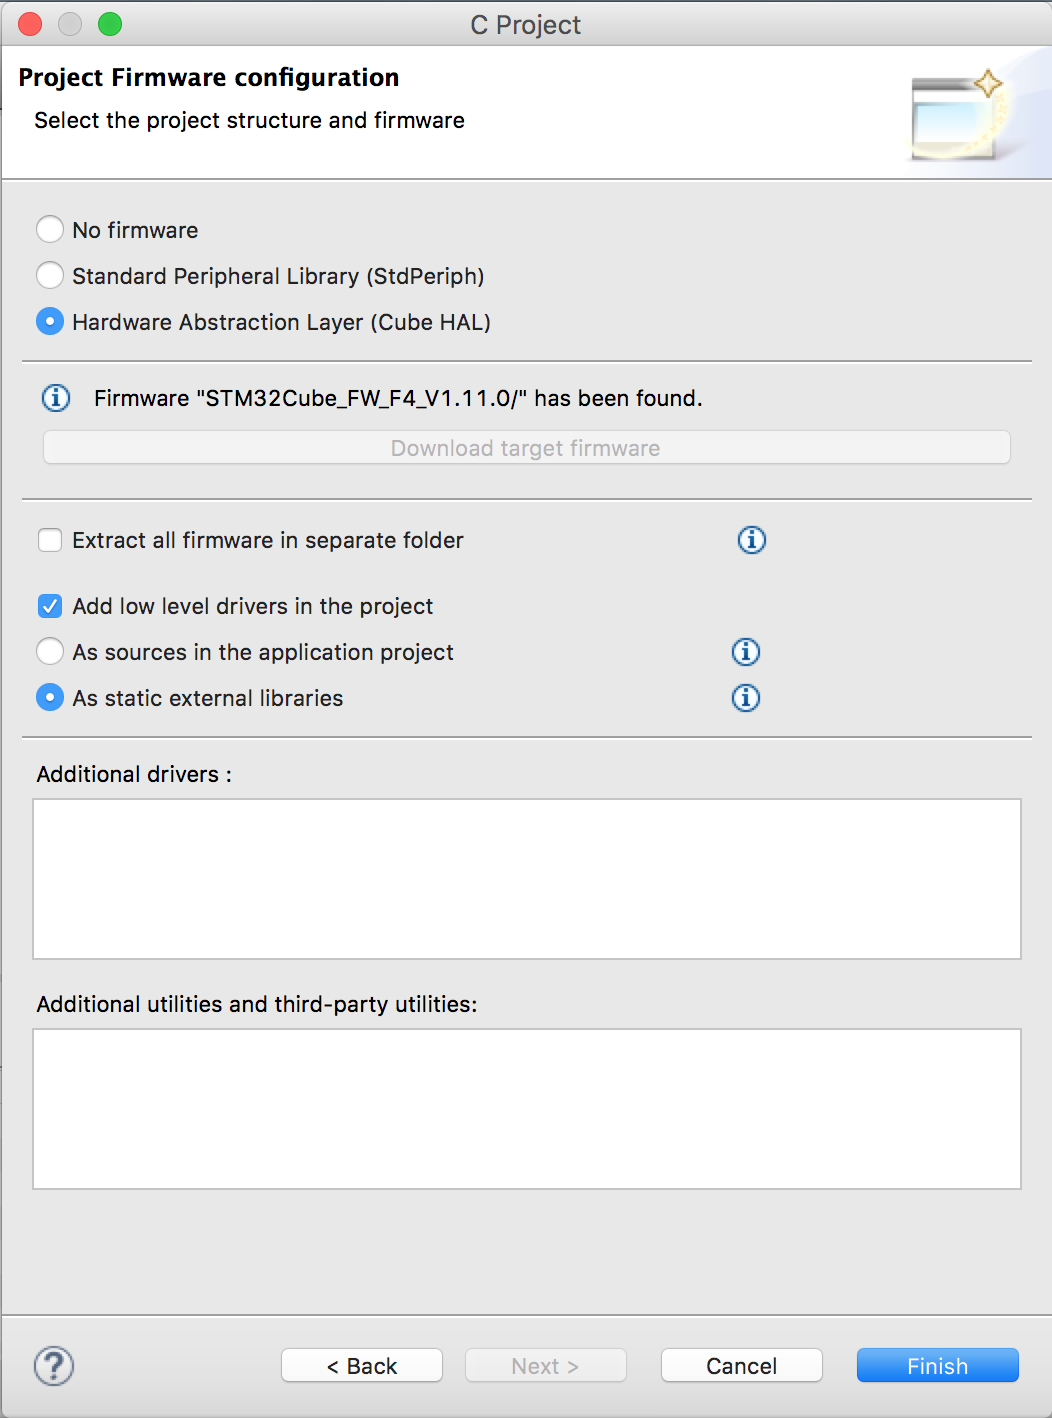
Finally, click “Finish” and let the IDE build your project.
Open your freshly downloaded CubeF4 package and go to “/Projects/STM32F429I-Discovery/Examples/GPIO/GPIO_EXTI”.
Now you need to do four things:
- Copy the contents of “GPIO_EXTI/Src” and paste them into “blink_example/src”. Overwrite any duplicate files.
- Copy the contents of “GPIO_EXTI/Inc” and paste them into “blink_example/inc”. Overwrite any duplicate files.
- Copy “startup_stm32f429xx.s” of “GPIO_EXTI/SW4STM32/” and paste it into “blink_example/startup”. Overwrite any duplicate files.
- Copy “STM32F429ZITx_FLASH.ld” of “GPIO_EXTI/SW4STM32/STM32F429I-Discovery/” and paste it into the root directory “blink_example/”. Overwrite any duplicate files.
Next, open “main.c” in the “src” folder inside Eclipse and press the “Build All” button in the toolbar. You only need to click this button for the first time compiling. For future builds, you only need to click the "Build" button left of it.
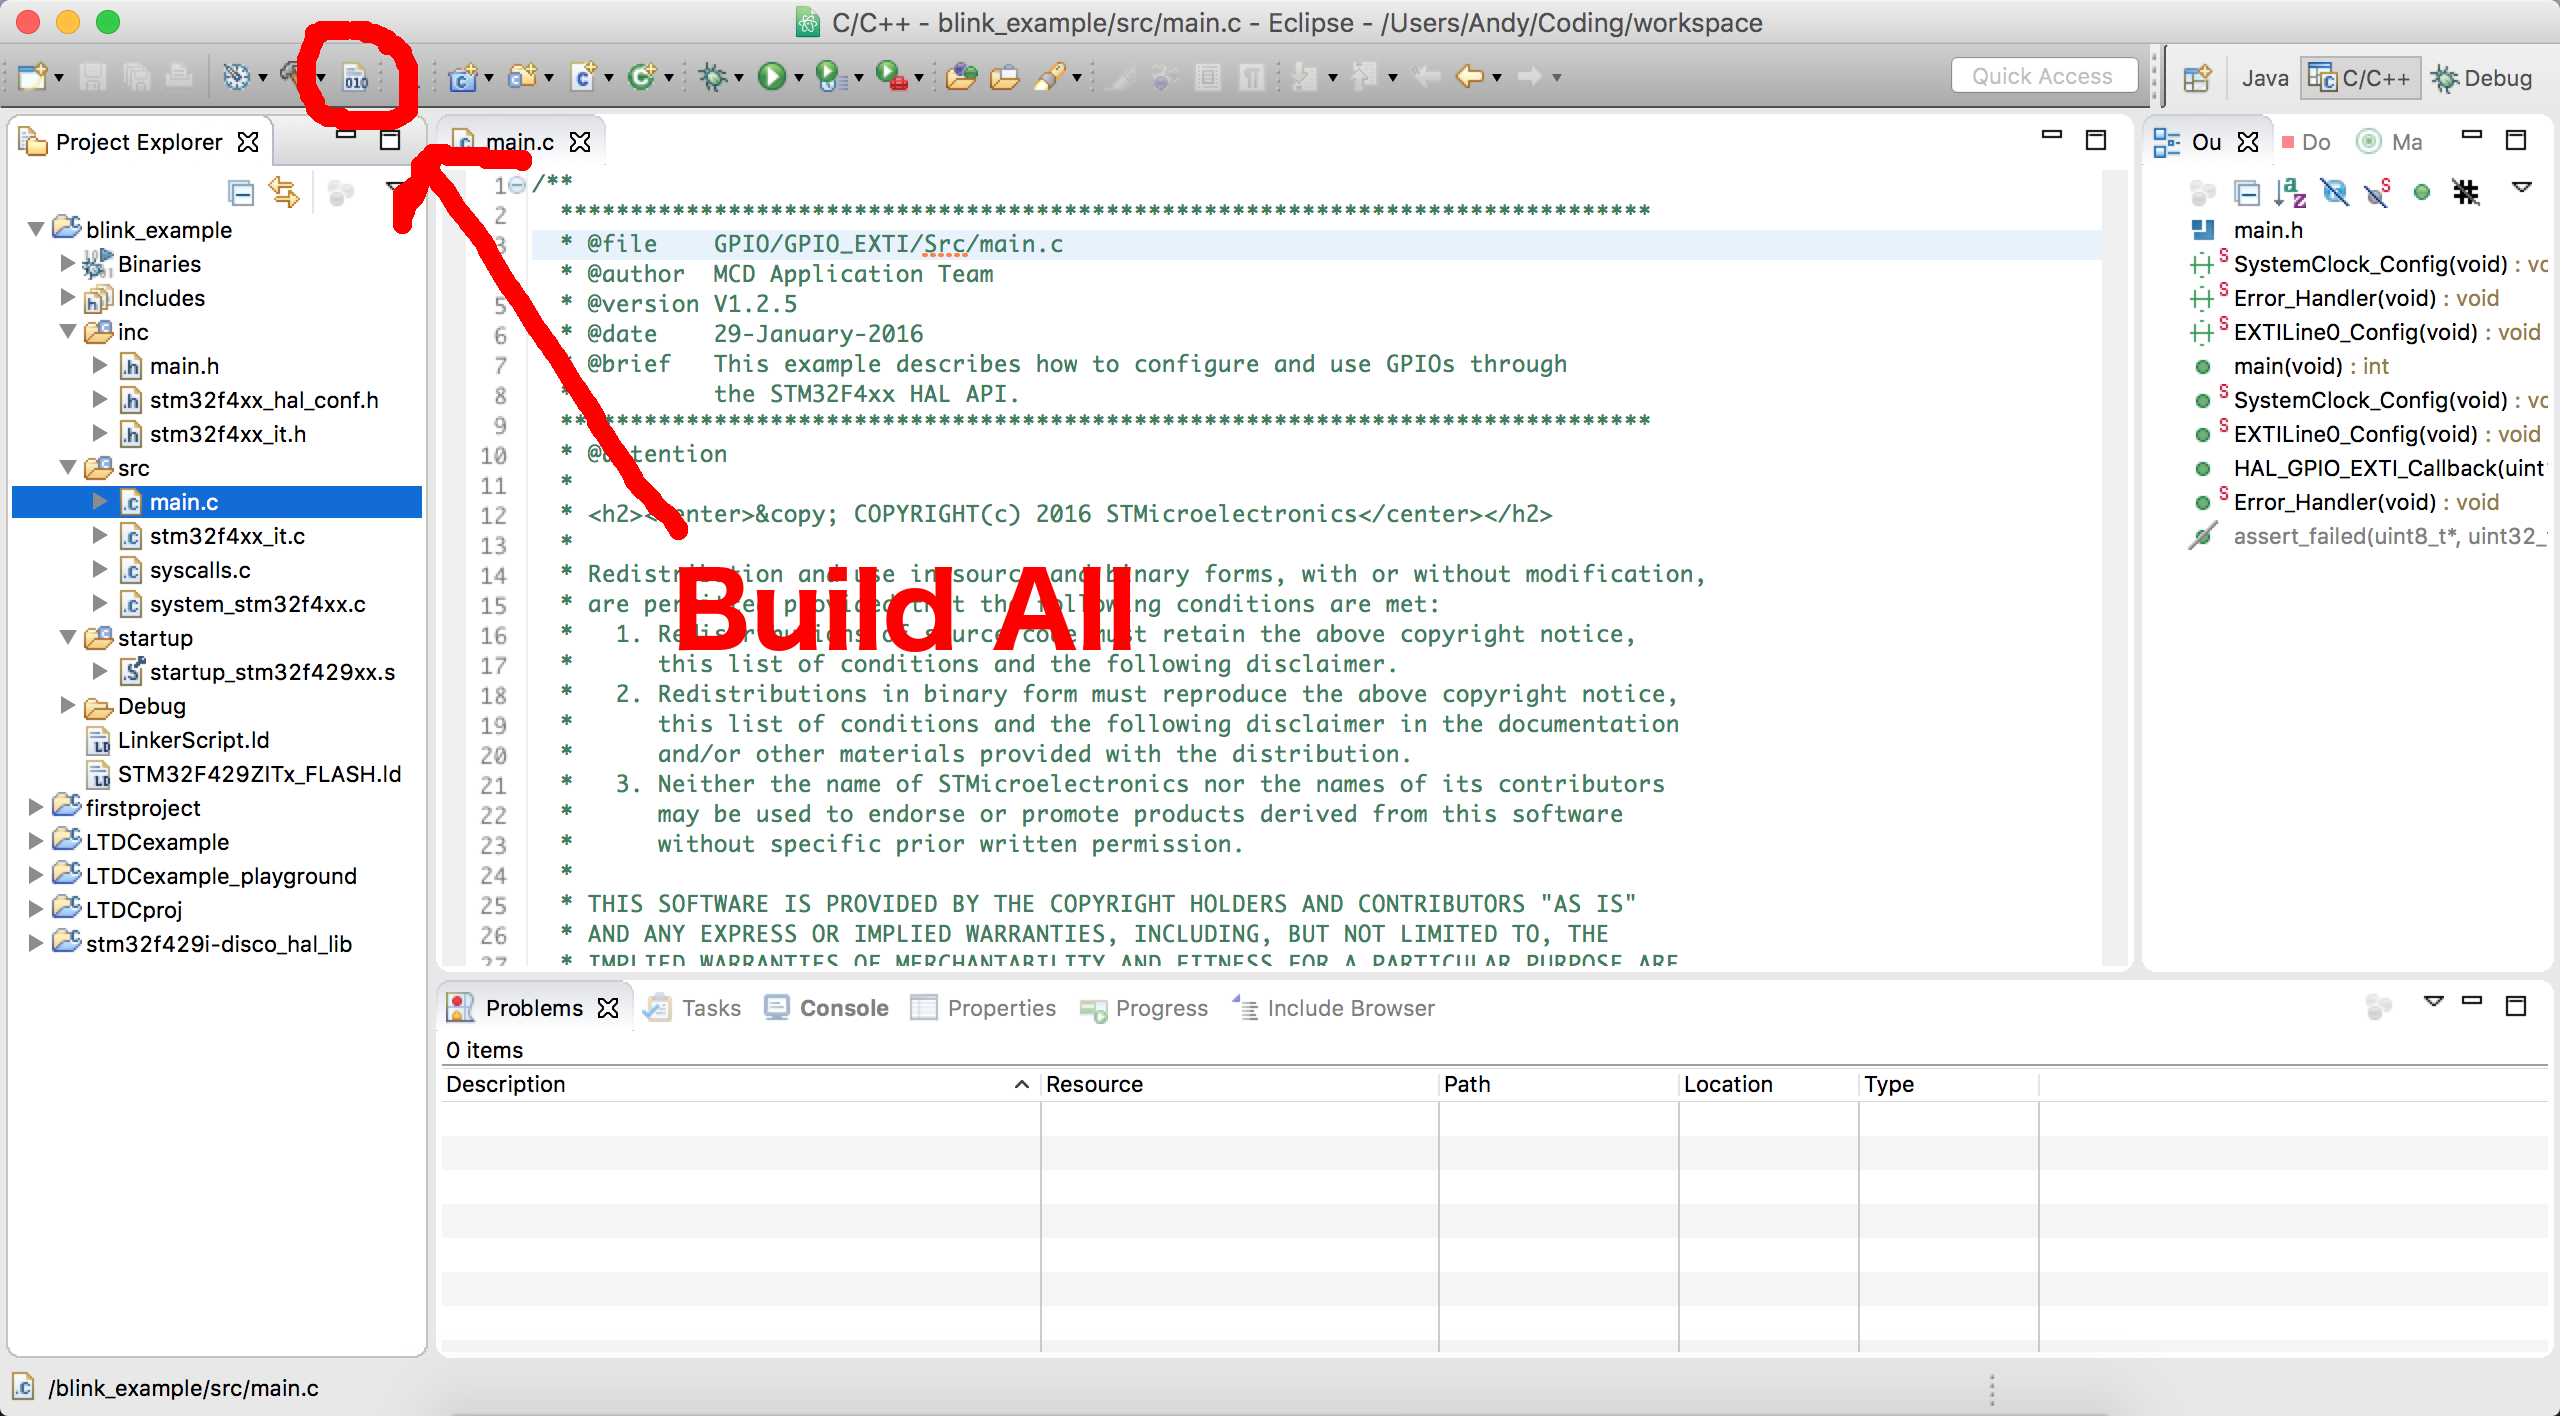
Everything should compile without errors. If errors show up and you can’t get rid of them, shoot me an email.
Loading the code onto the device
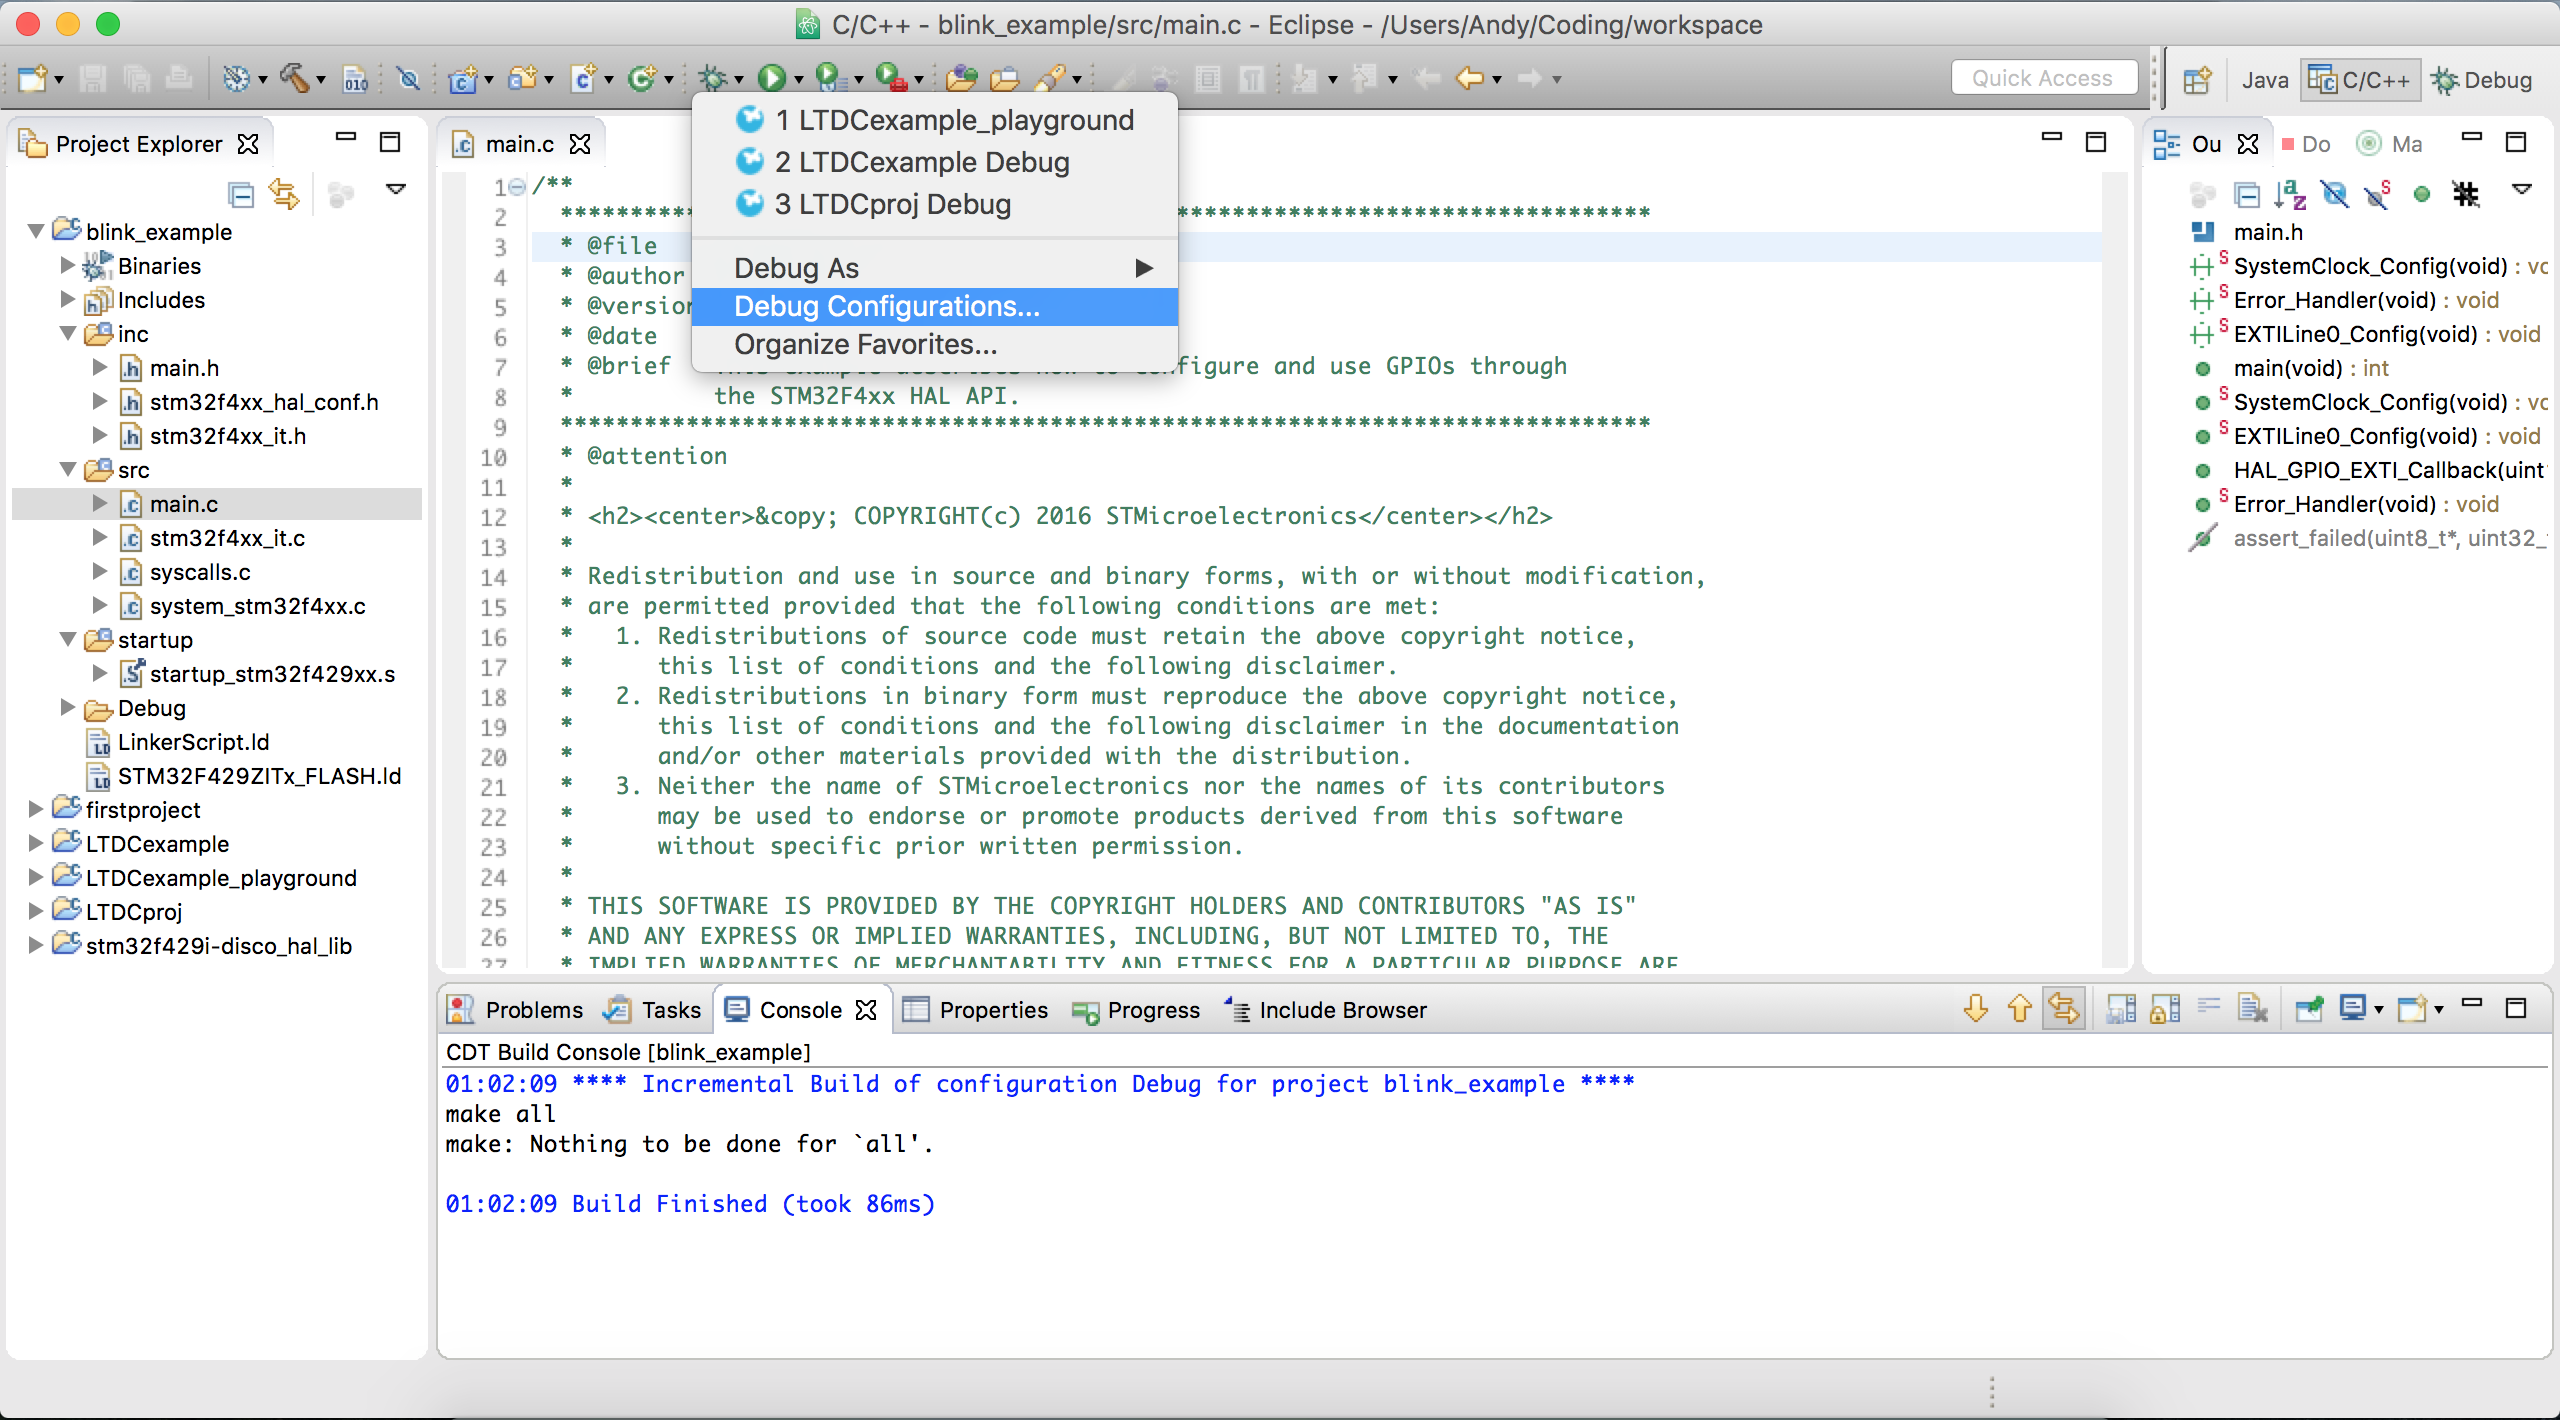
For your computer to talk to the discovery board you must add a new “Debug Configuration”. For that, right click on the “Debug” button in the toolbar and hit “Debug Configurations”.
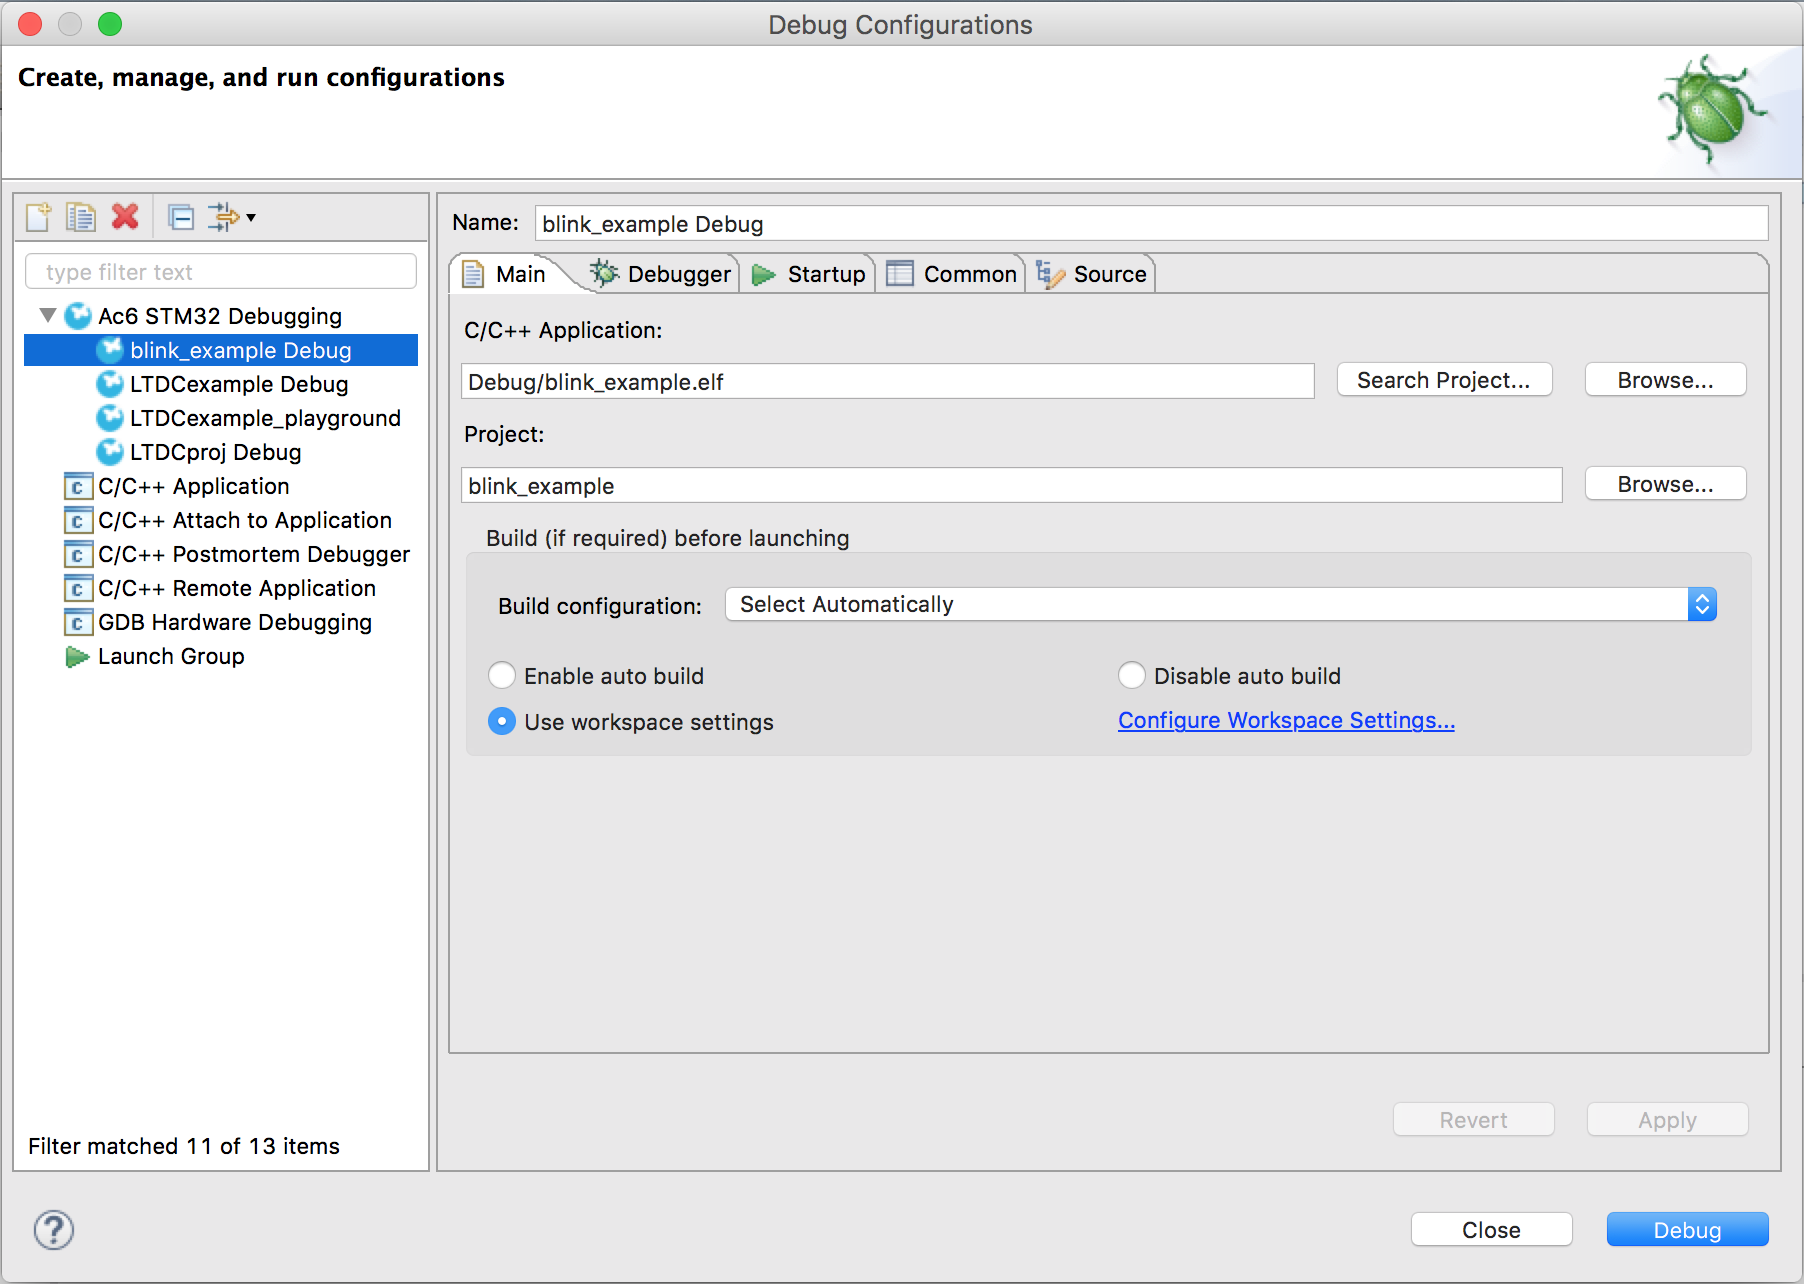
There, select “Ac6 STM32 Debugging” and click on the “New” button. Then, click “Debug” on the bottom right. For the next time, this configuration will be directly accessible in the drop-down menu of the “Debug” button when you right-click on it.
If you receive an error message, unplug the discovery board, plug it back in, and start the Debug Configuration again. If everything worked out and you are in the Debug View, click on the “Resume” button in the toolbar and the program will start!
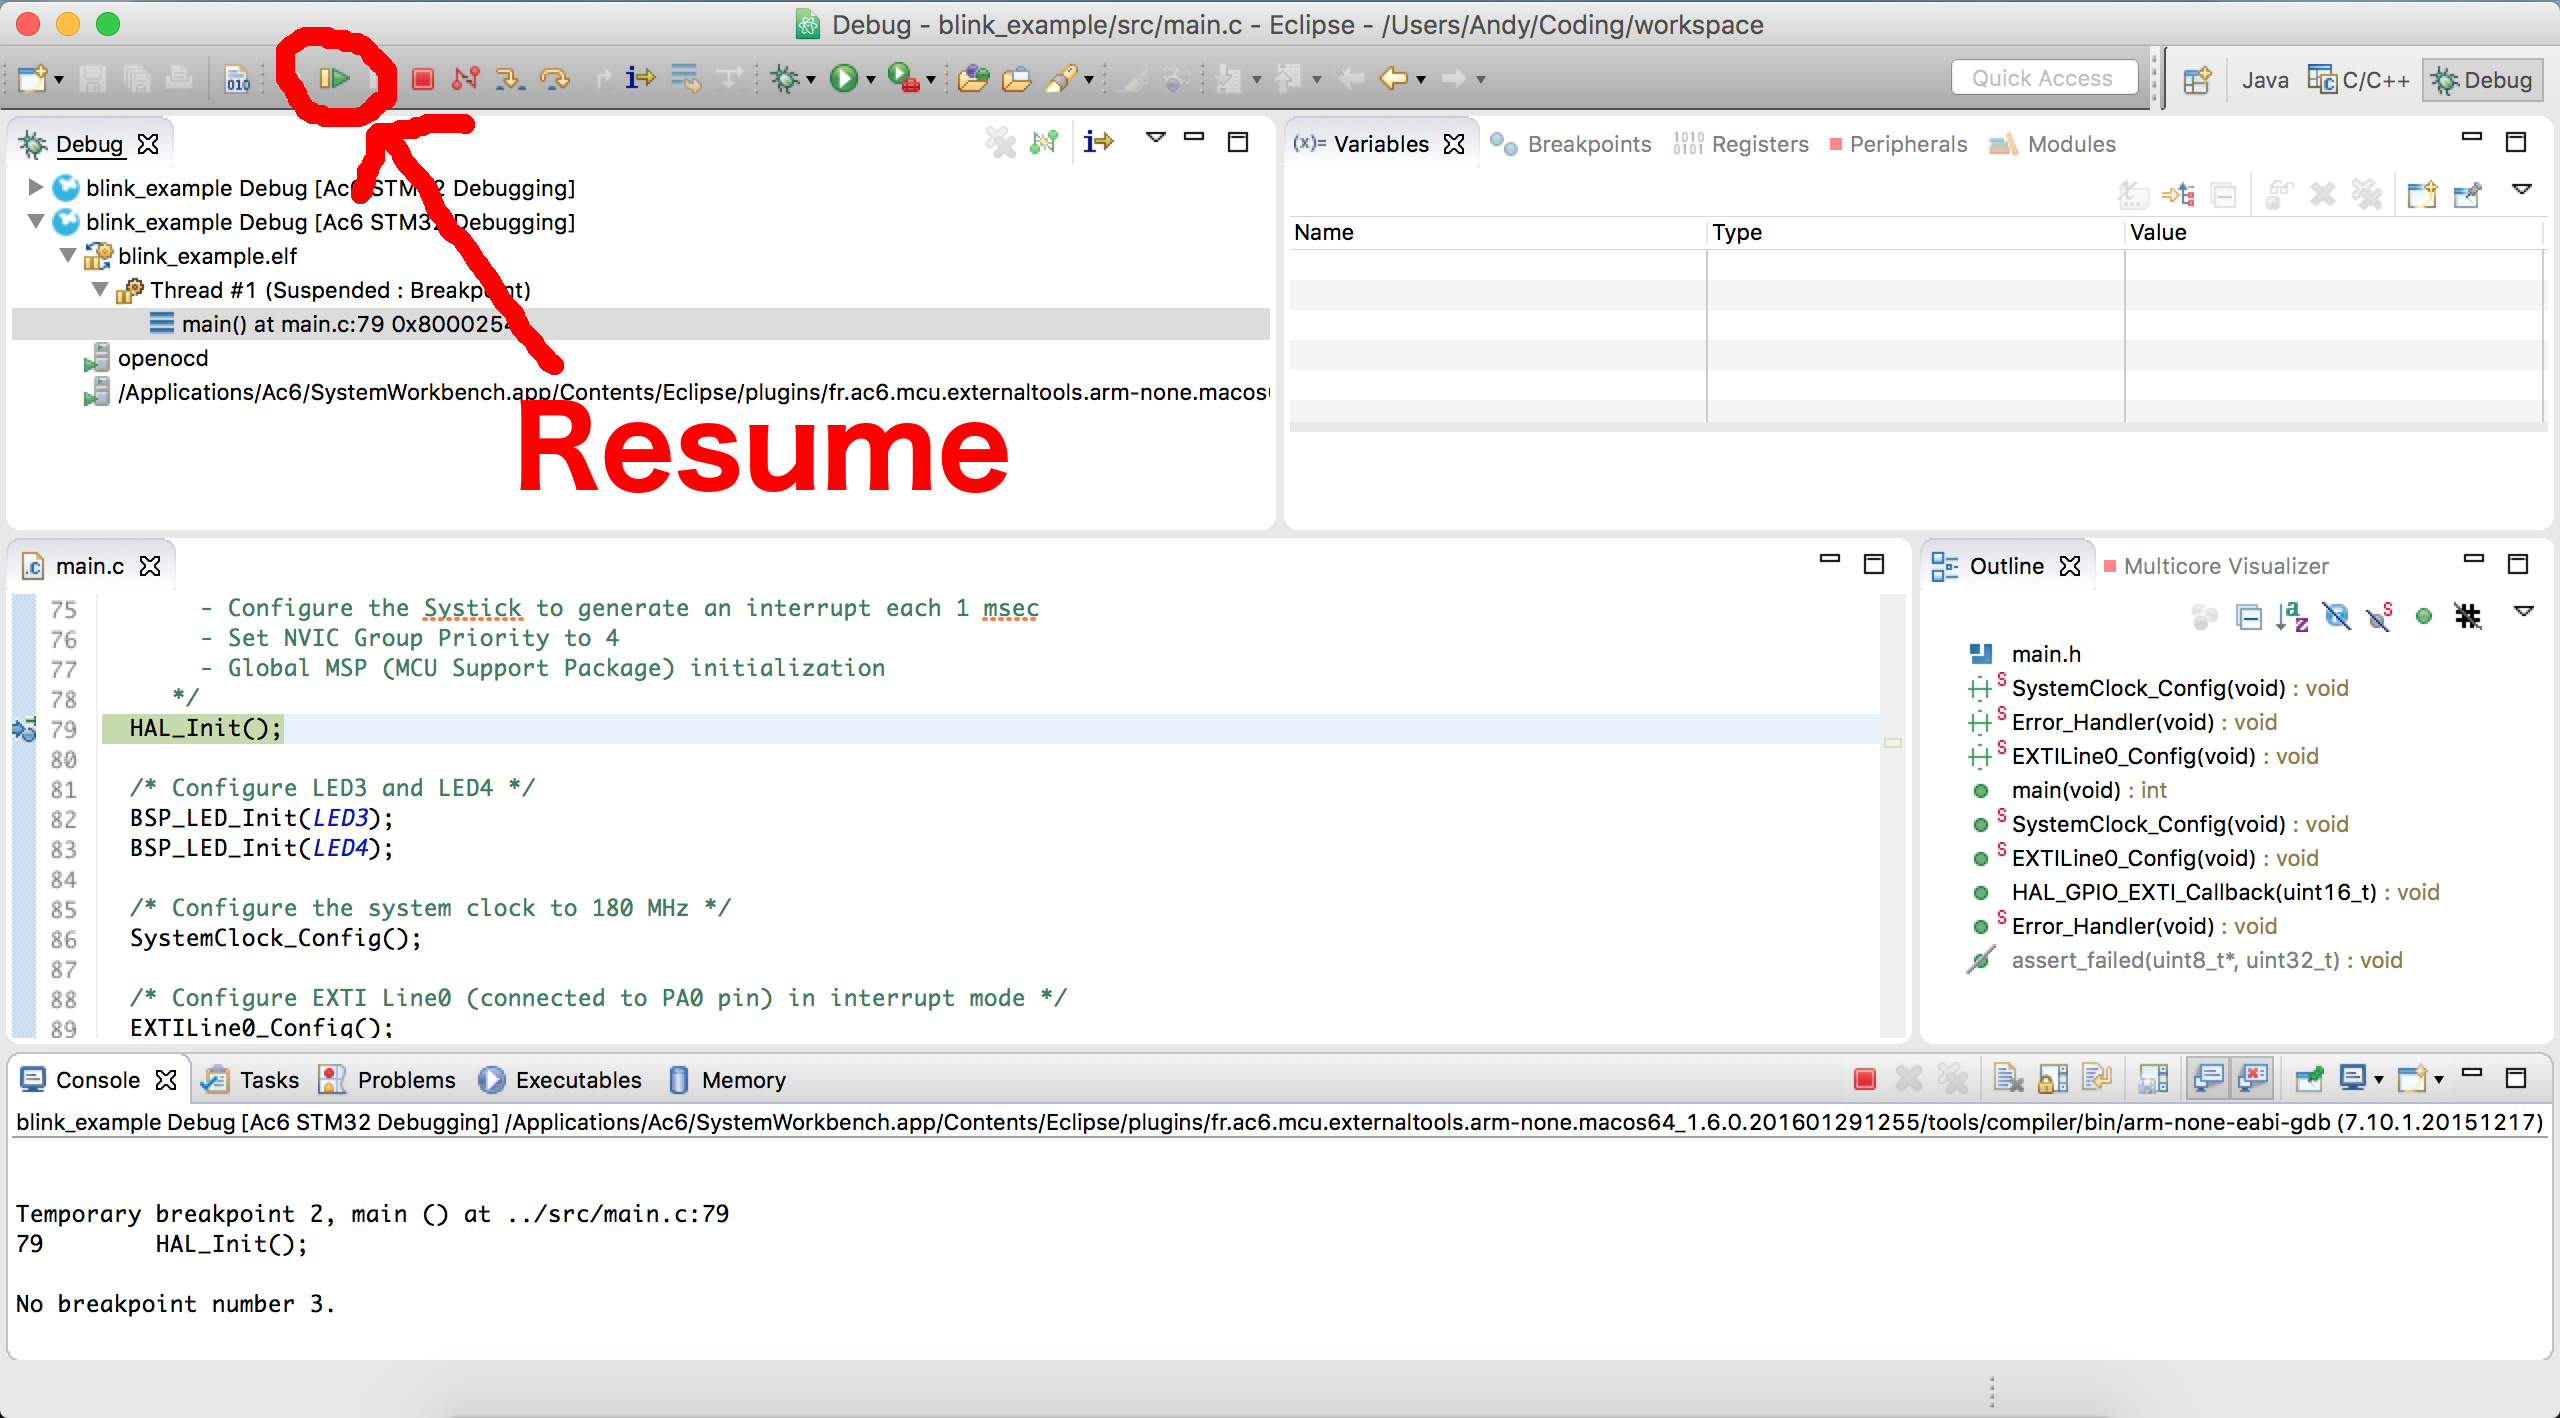
Press the “USER” pushbutton on the board and the green “LD3” LED should toggle.